Learning how to fix a corrupted SD card is stressful when the card contains photos you cannot easily replace. The good news is that many SD card problems are caused by file system errors, unsafe removal, camera interruptions, adapter issues, or reader problems rather than complete physical failure.
The most important rule is simple: stop using the card immediately. Do not take new photos, do not format it in the camera, and do not copy new files to it. When deleted or missing photos have not been overwritten, recovery software may still be able to find them.
A corrupted SD card can show different symptoms. It may ask to be formatted, appear as empty, load very slowly, display strange file names, or fail to open on one device but work on another. Each symptom points to a different level of damage, so the safest approach is to diagnose first and repair later.
This guide explains how to protect the card, check the simplest causes, recover lost photos, repair logical errors, and decide when professional help is safer than trying more tools at home.
Important safety note: do not format, repair, or run aggressive disk commands before trying to recover your photos. Some repair actions can change the file system and reduce the chance of recovering the original files.
First steps before trying to fix a corrupted SD card
Before using any repair tool, remove the SD card from the camera, phone, drone, or device where the problem appeared. If the card is still readable, copy the visible photos to a safe folder on your computer immediately. Do not organize, rename, or edit the files while they are still on the card.
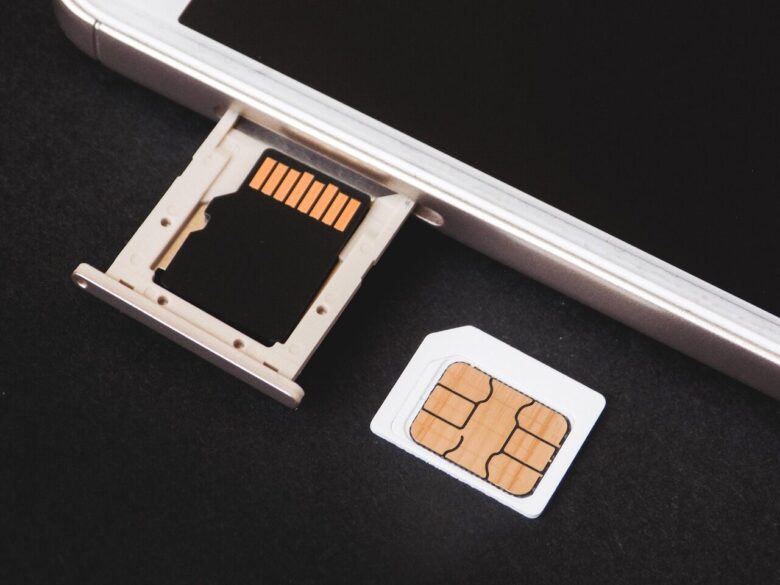
Use a reliable card reader instead of connecting the camera by cable. In many cases, the issue is not the card itself but the device, USB cable, adapter, or port. Try a different USB port, another card reader, and another computer if possible.
If the card makes your computer freeze, disconnect it safely and stop testing. Repeated failed reads can make a weak card worse, especially when the corruption is related to damaged flash memory rather than a simple file system issue.
- Stop taking new photos or videos with the corrupted SD card.
- Remove the card from the device safely.
- Try a different card reader, USB port, or computer.
- Copy any visible photos before attempting repairs.
- Do not format the card if the missing photos are important.
- Do not save recovered files back onto the same SD card.
Quick diagnosis: what the error usually means
Not every SD card error has the same cause. A card that asks to be formatted may have a damaged file system. A card that is not detected anywhere may have a physical or controller issue. A card that opens but shows missing photos may have deleted entries, hidden folders, or corrupted indexes.
The table below helps you decide what to check first. It does not guarantee the exact cause, but it gives you a safer order of action before using repair tools.
| Symptom | Possible cause | Safest first action |
|---|---|---|
| Computer asks to format the SD card | Damaged file system or unreadable partition | Cancel formatting and run photo recovery first |
| Photos disappeared but the card opens | Deleted files, hidden folder, or damaged directory | Copy visible files and scan with recovery software |
| Card is very slow or freezes the computer | Failing memory cells or read errors | Stop repeated testing and consider professional recovery |
| Card works in camera but not on computer | Reader, adapter, driver, or compatibility issue | Try another reader and another computer |
| Card is not detected anywhere | Physical damage, controller failure, or broken contacts | Do not force repairs; seek professional help if photos matter |
Recover your lost photos before repairing the card
The safest order is recovery first, repair second. Repair tools can fix file system errors, but they may also rename fragments, remove broken entries, or change allocation information. That can be useful when the card only needs to work again, but risky when the main goal is photo recovery.
Use a trusted recovery tool that scans the SD card and saves recovered photos to another drive. The destination can be your computer, an external hard drive, or another memory card. Never choose the corrupted SD card as the output location.
For photo recovery, tools that can scan below the visible folder structure are often more useful than simple undelete tools. Some utilities search for image signatures such as JPEG, PNG, RAW camera formats, and video files. This matters when the card’s folder structure is damaged but the underlying photo data still exists.
-
Connect the SD card using a reliable reader.
Use a stable USB port and avoid moving the reader during the scan. A loose connection can interrupt the process and make the result unreliable.
-
Open your recovery software and select the SD card.
Check the drive letter, size, and device name carefully. Choosing the wrong drive may waste time or risk scanning the wrong storage device.
-
Choose a deep scan if the quick scan fails.
A quick scan may find recently deleted files, while a deep scan can search the card more thoroughly. Deep scans take longer but are often better for corrupted cards.
-
Preview photos before saving when possible.
Preview helps confirm whether the recovered files are usable. Some recovered photos may be partial, duplicated, or renamed because corruption can damage file metadata.
-
Save recovered files to a different drive.
This prevents overwriting data that may still be recoverable on the corrupted SD card. Create a new folder on your computer or external drive for the recovered photos.
-
Check the recovered files before repairing or formatting.
Open several photos, compare file sizes, and confirm that your most important images are present before taking any repair action.
How to repair logical errors on Windows
After you have recovered the photos or copied everything important, Windows can sometimes repair file system errors using Error Checking or the CHKDSK command. This is useful when the SD card opens inconsistently, shows file system warnings, or reports errors after unsafe removal.
For a simple check, open File Explorer, right-click the SD card, choose Properties, open the Tools tab, and select the error checking option. If Windows finds problems, follow the instructions carefully.
For a command-line repair, open Command Prompt as administrator and use the correct drive letter. For example, if the SD card is drive E, you can run:
chkdsk E: /fThe /f option attempts to fix file system errors. If you use the wrong drive letter, you may scan another drive by mistake, so always confirm the SD card letter in File Explorer first. Avoid running multiple repair commands repeatedly if the card keeps failing.
How to repair an SD card on Mac
On Mac, Disk Utility can check and repair certain formatting and directory structure problems. This can help when the SD card appears in Disk Utility but does not open correctly in Finder, or when files behave strangely after a transfer problem.
Open Disk Utility, choose View, then Show All Devices. Select the SD card volume and run First Aid. If the device has multiple levels, run First Aid on the volume first, then on the container or device level when shown. Follow the on-screen instructions and wait until the process ends.
If Disk Utility says the card cannot be repaired, do not keep repeating the same process many times. Recover what you can, then consider formatting the card only after the important photos are safe. If the card fails again after formatting, replace it.
When formatting helps and when it is a bad idea
Formatting can make an SD card usable again, but it is not a recovery step. It rebuilds the file system and may make lost photos harder to recover if you continue using the card afterward. Only format after the recovery process is complete or when the photos are not important.
When the goal is to reuse the SD card, it is better to format it with a tool designed for SD cards or inside the camera or device that will use it. Formatting in the final device can reduce compatibility issues, especially with cameras, drones, dashcams, and action cameras.
| Action | When to use it | Main caution |
|---|---|---|
| Quick format | After photos are recovered and the card only needs a clean file system | Do not use before recovery if files are missing |
| Full overwrite format | When testing a card you no longer need to recover from | Can destroy recoverable photo data |
| Format in camera | When preparing the card for that specific camera | Only after backup or recovery is complete |
| SD card formatter tool | When you want formatting aligned with SD card standards | It repairs usability, not lost photo content |
Common mistakes that reduce photo recovery chances
A common mistake is pressing Format because Windows, macOS, or a camera suggests it. That message usually means the device cannot read the file system correctly. It does not mean formatting is the best first step if you still need the photos.
Another mistake is installing recovery software onto the same card or saving recovered files back to it. This can overwrite the exact data you are trying to restore. Always recover to a different drive.
People also try too many tools in a random order. A safer approach is to recover once with a good tool, check the results, make a copy if possible, and only then repair or format. Repeated scans are not always harmful, but unstable cards can get worse with heavy reading.
- Do not format before attempting recovery.
- Do not save recovered photos onto the corrupted SD card.
- Do not keep using a card that disconnects or freezes repeatedly.
- Do not run repair commands before copying visible files.
- Do not assume the first recovery scan found everything.
- Do not trust a card again if corruption returns after formatting.
When to replace the SD card or seek professional recovery
If the SD card is physically cracked, bent, burned, water-damaged, or not detected by any device, software repair is unlikely to solve the problem. In that situation, continuing to test the card may waste time or make recovery harder.
Professional recovery is worth considering when the photos are irreplaceable, the card is not detected anywhere, the card causes the computer to freeze, or recovery software cannot complete a scan. Professional labs may have tools for damaged memory chips and controller-level issues that normal software cannot fix.
For everyday photos, home recovery software may be enough. For wedding photos, paid client shoots, legal evidence, travel memories, or business media, it is safer to stop early and avoid experiments that could reduce the chance of recovery.
How to prevent SD card corruption in the future
Prevention is mostly about habits. Always eject the card safely before removing it from a computer. Wait for the camera to finish writing before turning it off. Avoid removing the card while videos are recording or while burst photos are still being saved.
Use quality cards from reliable sellers, especially for cameras, drones, and high-resolution video. Counterfeit or low-quality cards may show fake capacity, slow write speeds, or repeated corruption. If a card starts failing once, do not trust it for important shoots again.
Keep at least two backups of important photos. One copy can be on your computer and another on an external drive or cloud storage. SD cards are convenient for capturing photos, but they should not be treated as long-term storage.
Conclusion
The safest way to fix a corrupted SD card is to protect the photos first, recover lost files to another drive, and only then repair or format the card. This order reduces the risk of overwriting files that may still be recoverable.
If the card is readable, start with simple checks, a different reader, and recovery software. If the file system is the problem, Windows CHKDSK or Mac Disk Utility may help after recovery is complete.
If the card is physically damaged, not detected anywhere, or contains irreplaceable photos, stop using it and consider professional recovery. A repaired card can sometimes work again, but a card that has failed once should not be trusted for important photos without a backup plan.
FAQ
1. Can a corrupted SD card be fixed without losing photos?
Sometimes, yes, but the order matters. If the photos are important, recover them before trying to fix the card. Repair tools can correct file system errors, but they may also change the structure that recovery software uses to locate missing files. Start by trying another reader or computer, then scan the card with recovery software and save the recovered files somewhere else. After that, you can repair or format the SD card if you want to reuse it.
2. Should I format the SD card when my computer asks me to?
No, not if you still need the photos. A format message usually means the computer cannot read the file system properly. Formatting may make the card usable again, but it is not the safest first step for recovery. Cancel the message, stop using the card, and run recovery software first. Only format after you have recovered the files or confirmed that the missing photos are not important.
3. Why did my SD card suddenly become corrupted?
SD card corruption can happen after unsafe removal, interrupted file transfers, camera battery failure, recording errors, damaged adapters, poor-quality readers, or repeated use in different devices without formatting correctly. It can also happen when the card is old, counterfeit, or starting to fail physically. In many cases, the photos are still present but the file system no longer points to them correctly. That is why stopping use immediately is so important.
4. Can CHKDSK recover deleted photos from an SD card?
CHKDSK is mainly a file system repair tool, not a dedicated photo recovery tool. It can fix certain logical errors and may recover fragments in some cases, but it is not the best first choice when photos are missing. If your goal is to recover lost pictures, use recovery software before running CHKDSK. After your files are safe, CHKDSK can be useful for checking whether the card’s file system can be repaired.
5. Is it safe to use free photo recovery software?
Free recovery software can be safe if it comes from a trusted developer and does not require saving files back to the damaged card. Be careful with unknown tools that ask for unnecessary permissions, show aggressive warnings, or force payment before showing whether files are recoverable. A good recovery process should let you scan the card, preview results when possible, and choose a different destination for recovered photos.
6. Why are recovered photos sometimes renamed or out of order?
When an SD card is corrupted, the folder structure and file metadata may be damaged. Recovery software may find the photo data but not the original file name, date, folder, or camera sequence. As a result, recovered files can appear with generic names or in a different order. This does not always mean the recovery failed. Check the image previews, file sizes, and photo content before deleting anything.
7. Can I recover RAW camera files from a corrupted SD card?
In many cases, yes, especially if the recovery tool supports your camera’s RAW format. RAW files are larger than JPEG files, so they may take longer to scan and recover. They are also more likely to be incomplete if parts of the card have been overwritten or physically damaged. When scanning, choose options that include photos, videos, and RAW formats rather than only common image files.
8. What should I do if the SD card is not detected anywhere?
If the card is not detected by your camera, phone, computer, or multiple card readers, stop trying software repairs. Software needs the card to be recognized at some level before it can scan it. Check for visible damage and try one reliable reader, but avoid forcing the card into adapters or repeatedly reconnecting it. If the photos are valuable, professional recovery is the safer option.
9. Can a corrupted microSD card be repaired the same way?
Yes, the general process is similar for microSD cards: stop using the card, try another adapter or reader, recover files first, then repair or format later. The adapter is a common failure point, so test with another adapter before assuming the microSD card itself is damaged. If the microSD card is used in a phone, avoid letting the phone write new app data, photos, or downloads to it.
10. Is a repaired SD card safe to use again?
A repaired SD card may be safe for low-value temporary use, but it should not be trusted for important photos if corruption has happened more than once. After recovery, format the card properly and test it with nonimportant files. If errors return, replace it. SD cards are relatively inexpensive compared with the cost of losing photos from a trip, event, client shoot, or personal archive.
11. Why does the card work in my camera but not on my computer?
This can happen because of a card reader issue, adapter problem, unsupported file system, damaged USB port, or driver conflict. First, try a different reader and another USB port. Then test on another computer. If the camera can still display the photos, copy them through the camera cable if possible, but avoid taking new photos. Once the photos are safe, you can format the card in the camera for future use.
12. When should I stop trying DIY recovery?
Stop when the card disconnects repeatedly, freezes the computer, becomes extremely hot, is physically damaged, or contains photos that are too important to risk. Also stop if several recovery tools cannot complete a scan. DIY recovery is useful for logical corruption, deleted files, and readable cards. Physical failure is different and often requires professional tools. The earlier you stop unnecessary attempts, the better the chances may be.
Editorial note: This article is for educational purposes and focuses on safer recovery and repair decisions for SD cards. If the card contains irreplaceable photos or appears physically damaged, professional data recovery may be safer than repeated home repair attempts.
Official References
- Microsoft Learn — chkdsk command documentation
- Apple Support — Repair a storage device in Disk Utility on Mac
- SD Association — SD Memory Card Formatter
- CGSecurity — PhotoRec digital picture and file recovery

Marcus Hale is the founder of Priwoo StorageLab and a long-time camera storage enthusiast. After losing a full shoot to a corrupted card, he became obsessed with understanding how memory media really works. He now spends his time testing cards, breaking down storage specs, and helping photographers and videographers avoid data loss.