Learning why you should format your SD card in-camera can prevent many small problems that become painful at the worst possible moment. A card may look fine on your computer, but your camera has its own way of organizing folders, file names, recording settings, and card compatibility. Formatting inside the camera helps the card start clean in the exact environment where it will be used.
This matters because cameras write files differently from computers. A PC may create hidden folders, indexing files, recycle-bin data, or a file system setup that works well for general storage but is not ideal for continuous photo bursts, RAW files, or long video recording. The result can be slower writing, file errors, missing thumbnails, or a camera warning that appears right before a shoot.
Formatting in-camera does not magically repair a physically damaged card, and it does not replace proper backups. However, it does reduce compatibility issues by letting the camera prepare the card according to its own firmware, expected directory structure, and supported file system. For photographers, vloggers, drone users, and anyone who records important moments, that small habit can save time and stress.
The safest workflow is simple: copy your photos and videos to at least one reliable backup, confirm the files open correctly, put the card back in the camera, and format it using the camera menu. This article explains why that process is usually better than formatting on a PC, when a computer tool may still be useful, and how to avoid the most common SD card mistakes.
Important note: formatting a memory card usually deletes the visible files on that card. Before formatting, always back up your photos and videos, confirm the backup works, and avoid removing the card or turning off the camera while formatting is in progress.
Why Format Your SD Card In-Camera Instead of on a PC?
The main reason to format your SD card in-camera is compatibility. Your camera is the device that will write the photos, videos, RAW files, thumbnails, metadata, and folder structure. When the camera formats the card, it prepares the storage in a way that matches its own firmware and recording behavior.
A computer sees an SD card as a general storage device. That is useful for copying files, but it is not the same as preparing the card for a camera. Windows or macOS may format the card with settings that are technically valid but not the best match for your specific camera model, especially with large SDXC cards, 4K video, burst shooting, or older camera firmware.
In practice, many card problems appear after the card has been used in several devices: a laptop, a phone, a drone, an action camera, and then a DSLR or mirrorless camera. Formatting in-camera gives the card a clean start for one device instead of carrying over hidden files, folder structures, or file numbering habits from another system.
| Formatting Method | Best Use | Main Caution |
|---|---|---|
| In-camera format | Preparing a card for regular photo or video capture in that camera. | Back up files first because formatting removes visible data from the card. |
| PC quick format | General storage use, USB drives, or temporary file cleanup. | May not create the best setup for camera recording. |
| Official SD formatter | Recovering a card layout or preparing a card outside the camera when needed. | Still requires checking camera compatibility afterward. |
| Deleting files manually | Removing a few unwanted photos after backup. | Does not fully refresh the card structure like formatting does. |
How Cameras Use SD Cards Differently From Computers
A camera does more than save image files. It creates a folder system, controls file numbering, writes thumbnails, stores video clips in specific containers, and records metadata that helps the camera display and manage files correctly. Many cameras follow a predictable structure so images can be reviewed, organized, and imported by software later.
A PC is more flexible. That flexibility is useful, but it can also introduce unnecessary items onto the card. For example, a computer may add hidden system files, preview databases, trash folders, or indexing information. Those files usually do not damage the card, but they can confuse some cameras or make troubleshooting harder when a card starts acting strangely.
Another difference is write behavior. Cameras often write large amounts of data quickly, especially during burst shooting, RAW capture, high-bitrate video, or continuous recording. A card that works fine for copying documents on a PC may still fail or slow down during camera recording if its format, speed class, or condition is not suitable.
What Formatting Actually Does to an SD Card
Formatting prepares the card with a file system and directory structure so a device can store and find files. It is not the same as simply deleting photos one by one. Deleting removes file entries, while formatting gives the card a fresh structure and helps the camera manage new files more predictably.
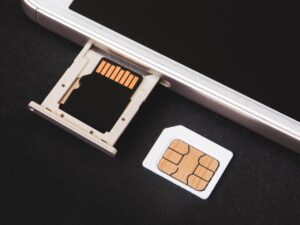
Most SD cards follow capacity-based standards. Standard SD cards, SDHC cards, SDXC cards, and SDUC cards may use different file systems such as FAT16, FAT32, or exFAT depending on capacity and device support. That is one reason formatting large cards on a PC without checking the proper file system can create compatibility problems.
It is also important to understand that formatting is not always secure erasure. In many cases, files may still be recoverable with specialized software until new data overwrites them. If privacy is the concern, use secure erasure methods recommended by the card maker or device manufacturer, not just a normal in-camera format.
| Card Type | Typical Capacity Range | Common File System |
|---|---|---|
| SD | Up to 2 GB | FAT12 or FAT16 |
| SDHC | More than 2 GB up to 32 GB | FAT32 |
| SDXC | More than 32 GB up to 2 TB | exFAT |
| SDUC | More than 2 TB up to 128 TB | exFAT |
Why PC Formatting Can Cause Camera Problems
PC formatting is not always wrong, but it is easier to make the wrong choice. A user may select NTFS, an unusual allocation size, the wrong partition scheme, or a file system that the camera does not fully support. The card may mount perfectly on the computer but fail inside the camera.
A common example is formatting a large SDXC card as FAT32 for compatibility with an older device, then trying to use it in a camera that expects exFAT for that card size. Another example is formatting a card in a computer after it was used in a phone or drone, then moving it to a camera without letting the camera rebuild the card structure.
Hidden computer files can also create confusion. Some cameras ignore them without issue, while others may show errors, display unexpected folders, or fail to show edited images correctly. This is especially common when users rotate, rename, edit, or move files on a computer and then expect the camera to read them as if nothing changed.
When Formatting In-Camera Helps the Most
Formatting in-camera is most useful before an important shoot, after transferring all files, after using the card in another device, or when the camera starts showing memory card warnings. It gives the camera a clean card layout and reduces the chance of leftover files interfering with new captures.
This habit is especially important for video. Video recording depends on steady write performance. If the file system is messy, the card is nearly full, or the card has been used across multiple devices, recording may stop unexpectedly. Formatting in-camera before a serious recording session is a simple way to remove avoidable problems.
Photographers who shoot RAW bursts also benefit. RAW files are large, and burst shooting pushes data quickly to the card. A fresh in-camera format does not make a slow card fast, but it does reduce clutter and gives the camera the cleanest possible starting point before heavy writing.
- Format the card in-camera after backing up all files.
- Use one card mainly with one camera whenever possible.
- Format before important shoots instead of deleting files one by one.
- Check that the card speed rating matches your camera’s video or burst needs.
- Replace cards that repeatedly show errors even after proper formatting.
Safe Step-by-Step Workflow Before Formatting
The safest formatting routine is not complicated. The key is to treat formatting as the final step after backup, not as the first step when you are in a hurry. A clean workflow protects your files and keeps the card ready for the next use.
-
Transfer your files to a computer or storage drive.
Copy all photos and videos from the SD card before formatting. Do not rely only on thumbnails or import messages; make sure the actual files are present in the destination folder.
-
Verify that the backup opens correctly.
Open a few photos and videos from the backup location. For professional work, keep at least two copies before formatting the original card.
-
Put the card back into the camera.
Use the same camera where the card will be used next. This allows the camera to create the correct file structure for its own recording process.
-
Use the camera’s format menu.
Go to the setup or tools menu and choose the format option. Avoid turning off the camera or opening the card door while formatting is happening.
-
Take a test photo or short test video.
After formatting, capture a quick test file and play it back in the camera. This confirms the card is recognized and ready before you depend on it.
Common Mistakes That Damage Your SD Card Workflow
One common mistake is deleting files manually after every shoot instead of formatting after backup. Manual deletion works for small cleanup, but over time it can leave a less organized card structure. Formatting in-camera is cleaner when you are preparing the card for a new session.
Another mistake is sharing one SD card across many devices. A card used in a phone, action camera, drone, laptop, and mirrorless camera may collect different folders and formatting expectations. If you must move a card between devices, format it in the device you plan to use next after backing up files.
A third mistake is ignoring repeated card warnings. If the camera keeps asking you to format the card, stops recording, corrupts files, or becomes slow with the same card, formatting may not be enough. The card may be failing, fake, too slow, or incompatible with your camera.
| Problem | Possible Cause | What to Check |
|---|---|---|
| Camera says card cannot be used | Wrong format, unsupported card type, or card failure. | Format in-camera, check manual compatibility, test another card. |
| Video stops recording | Card too slow, nearly full, corrupted, or poorly formatted. | Use a faster approved card and format it in-camera before recording. |
| Images disappear from camera playback | Files edited, renamed, moved, or changed on a computer. | Do not edit card files directly if you still need camera playback. |
| Repeated corrupted files | Failing card, interrupted writing, or unsafe removal. | Stop using the card for important work and test with a new card. |
When a PC Formatting Tool Still Makes Sense
There are cases where a computer tool is useful. If the card has a damaged layout, was formatted incorrectly, or is not recognized properly by the camera, an official SD formatting utility may help restore a standard SD card structure. This is different from using a random operating system format option without knowing the correct settings.
A PC may also be necessary when the camera cannot format the card at all. For example, the card may not be recognized, may have a strange partition layout, or may have been used in a device that changed its structure. In that case, use a trusted formatting tool, then put the card into the camera and format it again inside the camera before shooting.
However, a computer should not be your everyday formatting method for camera use. Think of PC formatting as a troubleshooting step, not the normal routine. For regular photography and video work, the camera’s own format function is usually the cleaner and safer choice.
- Use a PC formatting tool only when the camera cannot format the card or the card layout seems broken.
- Avoid choosing NTFS for cards that will be used in cameras unless the manufacturer specifically supports it.
- Do not remove the card while the computer is writing, formatting, or repairing it.
- Safely eject the card before removing it from the computer.
- After PC formatting, insert the card into the camera and format it again in-camera.
How Often Should You Format an SD Card?
A practical routine is to format the card after every complete backup and before a new shooting session. You do not need to format after every single photo, but you should avoid using the same card for weeks while only deleting random files. A fresh format keeps the card organized and ready.
For casual users, formatting before trips, events, or important recording days is usually enough. For professional work, many photographers format cards after each job once the files are safely backed up in multiple places. The important rule is never format before you are absolutely sure your files are copied and verified.
If you shoot video, format more intentionally. Long recording sessions and high-bitrate files put more pressure on the card. Starting with a clean card reduces avoidable interruptions and makes it easier to estimate remaining recording time.
When to Replace the Card or Contact Support
Formatting helps with organization and compatibility, but it cannot fix every problem. If a card repeatedly fails, becomes very slow, disconnects, shows corrupted files, or causes recording errors across multiple devices, stop trusting it for important work. Memory cards are consumable storage, not permanent archives.
You should also check your camera manual or manufacturer support page when using very large cards, high-speed cards, UHS-II cards, SD Express cards, or cards for demanding video modes. Some cameras support only certain capacities, speed classes, or card types. Buying a fast card does not guarantee full compatibility with every camera.
For paid work, weddings, travel, legal documentation, or once-in-a-lifetime moments, do not experiment with suspicious cards. Use reputable cards, test them before the job, format them in-camera, and replace them at the first sign of repeated failure.
Conclusion
The reason to format your SD card in-camera is simple: the camera knows how it wants the card prepared. A PC can copy files well, but it may not create the most compatible setup for your camera’s folders, file system expectations, video recording, RAW bursts, and playback behavior.
The best routine is to back up your files, verify the backup, return the card to the camera, and use the camera’s format option before the next shoot. This small habit helps prevent avoidable card errors, messy file structures, and recording problems caused by using the card across different devices.
If a card continues to show warnings after proper formatting, do not rely on it for important work. Check the camera manual, use official support resources, try a known good card, and replace any card that repeatedly causes errors.
FAQ
1. Is formatting an SD card in-camera better than deleting photos?
Yes, formatting in-camera is usually better when you are preparing the card for a new shooting session. Deleting photos removes selected files, but it may leave folders, hidden files, and old structure behind. Formatting gives the camera a clean card layout and helps it manage new photos and videos more predictably. You should still delete individual files when you only need to remove a few mistakes, but after a full backup, formatting is the cleaner option. Always confirm your files are safely copied before formatting.
2. Does formatting an SD card erase everything permanently?
Formatting usually removes the visible file structure, so the camera or computer treats the card as empty. However, it does not always erase every trace of data permanently. In many cases, recovery software may still find old files until new data overwrites that space. For normal camera use, formatting is enough to prepare the card for new shooting. For privacy, selling, or giving away a card, use secure erasure methods recommended by the card maker or device manufacturer.
3. Should I format a brand-new SD card in my camera?
Yes, it is a good habit to format a brand-new SD card in the camera before using it for real photos or videos. New cards often come preformatted, but the camera can still prepare the folder structure and file system behavior it expects. This also gives you a chance to confirm that the card is recognized, works correctly, and has the expected capacity. After formatting, take a test photo or short video and play it back before trusting the card for important work.
4. Can formatting fix a corrupted SD card?
Formatting may fix some file system problems, but it cannot repair physical damage or a failing memory card. If the issue is only a messy card structure, formatting in-camera may make the card usable again. If the card repeatedly corrupts files, disappears from the camera, stops video recording, or fails in different devices, replace it. Before formatting a corrupted card, try to recover important files first, because formatting can make recovery harder if new data is written afterward.
5. Is it bad to format an SD card too often?
Normal formatting after backups is not usually a problem for typical camera use. SD cards have limited write cycles, but regular in-camera formatting is part of a healthy workflow for photographers and videographers. The bigger risks are unsafe removal, fake cards, overheating, physical damage, using the wrong card for high-bitrate video, or ignoring repeated errors. You do not need to format constantly during the same shoot, but formatting before a new session after backup is a safe and common practice.
6. Why does my camera ask me to format the card?
A camera may ask you to format the card because it does not recognize the file system, the card was formatted in another device, the folder structure is incompatible, or the card has an error. It may also happen when the card is new, damaged, or too large for the camera’s supported range. Do not immediately format if the card contains important files. First, try to copy or recover the data on a computer. After backup, format the card in the camera and test it.
7. Can I use the same SD card in different cameras?
You can, but it is not ideal if you care about reliability. Different cameras may create different folders, file numbering systems, video structures, and metadata. Moving the same card between cameras can lead to playback issues, confusing file numbers, or format warnings. The safer method is to dedicate cards to specific cameras. If you must switch devices, back up the card first, insert it into the new camera, and format it there before shooting.
8. Should I format my SD card as FAT32 or exFAT on a PC?
For camera use, it is better to let the camera choose whenever possible. In general, SDHC cards commonly use FAT32, while SDXC and SDUC cards commonly use exFAT. However, choosing manually on a PC can create problems if your camera expects a different setup or has specific compatibility limits. If you need to format on a computer, use an official SD formatting tool when appropriate, then put the card in the camera and format it again before using it.
9. Why do videos stop recording even after formatting?
If video stops recording after formatting, the card may be too slow, incompatible, fake, damaged, overheating, or not approved for your camera’s video mode. Formatting gives the card a clean structure, but it does not change the card’s real write speed. High-resolution and high-bitrate video require cards that can sustain writing without interruption. Check your camera manual for approved card types and speed ratings. Test the card before important work, especially for long recordings.
10. Is quick format enough for an SD card?
For normal camera preparation, the camera’s standard format option is usually enough after your files are backed up. A quick format on a computer may be fine for general storage, but it is not the best everyday habit for camera cards. If the card has deeper problems, a full overwrite or official SD formatting utility may help diagnose or reset the card layout. Still, if problems return often, replacing the card is safer than repeatedly trying to repair it.
11. Can editing photos on the SD card cause camera errors?
Yes, editing, rotating, renaming, or moving photos directly on the SD card can cause playback problems in the camera. The computer may change metadata, file names, thumbnails, or folder structure in a way the camera does not expect. The files may still open on the computer, but the camera may not display them correctly. The safer workflow is to copy files to your computer first, edit the copied files, and leave the card structure alone until you format it in-camera after backup.
12. What should I do if my SD card keeps failing?
If an SD card keeps failing, stop using it for important photos or videos. First, back up or recover any files you can. Then test the card in the camera after formatting, and test another reliable card in the same camera. If only one card causes problems, replace it. If multiple cards fail in the same camera, check the camera slot, firmware, battery, and manufacturer support resources. Repeated card errors should not be ignored, especially for paid or important work.
Editorial note: this article is for educational purposes and does not replace your camera manufacturer’s manual, official card compatibility list, or professional data recovery support when important files are at risk.
Official References
- SD Association — SD Memory Card Formatter for Windows/Mac
- SD Association — Capacity Standards for SD, SDHC, SDXC and SDUC Cards
- Nikon Online Manual — Format Memory Card
- Microsoft Learn — exFAT File System Specification

Marcus Hale is the founder of Priwoo StorageLab and a long-time camera storage enthusiast. After losing a full shoot to a corrupted card, he became obsessed with understanding how memory media really works. He now spends his time testing cards, breaking down storage specs, and helping photographers and videographers avoid data loss.